

How To Clean A Gas Impingement Tube
Y'all've fired a couple one thousand rounds through your AR-fifteen and y'all know yous need to clean it, just you also want to take intendance of such a big and precious investment. This blog post shows you how to clean your firearm thoroughly and gently, restoring it to tip-top status. It also briefly outlines the differences between the different types of AR-15'south. If you want to know how you can best clean your firearm, cheque out this article.
Firstly, information technology's important to notation the differences between the two types of AR-15'southward. At that place'due south a direct impingement organisation and a piston operated system.
The most common AR-15 platform on the marketplace is the direct impingement organization. When the bolt is forward in the lock position and the trigger is pulled and the primer is struck, the bolt and well-nigh of the gases exit out the barrel. Some of the gases make their way back up through the gas tube. There's a gas lock there that goes up through the tube and comes dorsum into the action area. When the bolts are released it throws the bolt carrier back, a new cartridge is grabbed, and it moves forward again. And then all of those hot gases make their style dorsum into the activeness area of the AR-xv. With a piston operated system, instead of those gases making their way all the way back into the action, there's a piston that the gases button confronting and the pistol in turn pushes the commodities back, allowing it to come forrard and cycle once again. The big advantage for a lot of people is that a piston operated arrangement tends to run cleaner. There are some other nuances to information technology and y'all'll observe people who prefer one organisation over some other, but we'll get out that choice up to you.
Earlier we bound into the actual cleaning of the firearm, nosotros want to make sure that information technology is safe. Pull the charging handle back and so push in the bolt catch.
This allows you to both visually and physically audit the firearm to make sure that information technology's unloaded.
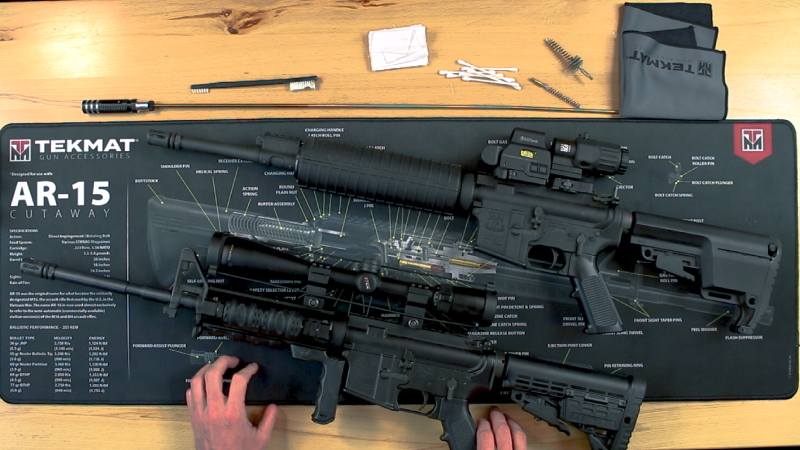
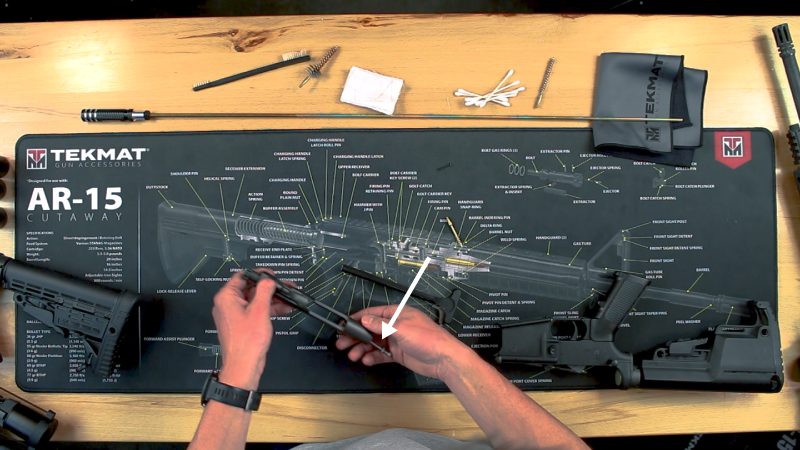
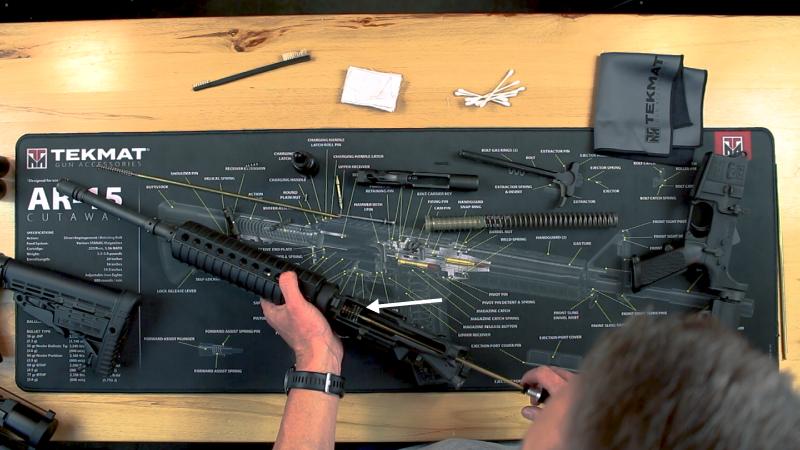
Next you need to make sure yous have the correct materials. Outset you'll demand the TekMat, of grade, which is nice because it has a visual diagram of all the parts as well as a total gun parts lists.The exploded view of the AR-15 on the mat shows you where the parts go if you've disassembled the firearm and have a question about how to put it together. The TekMat is also handy because it protects both your firearm and your workbench. It features a rubber bankroll, which prevents any sort of chemicals making information technology through the mat and harming the surface yous're working on. Information technology besides protects your firearm and keeps small parts from rolling around and getting lost. Secondly you'll demand a cleaning rod, a sleeping room brush that is specific to an AR-fifteen, a diameter brush, and a jag. You'll also demand a few cotton swabs, a nylon brush, some thick and thin patches, a TekMat TekTowel, and your chemicals: cleaner, lubricant, and protectant, split.
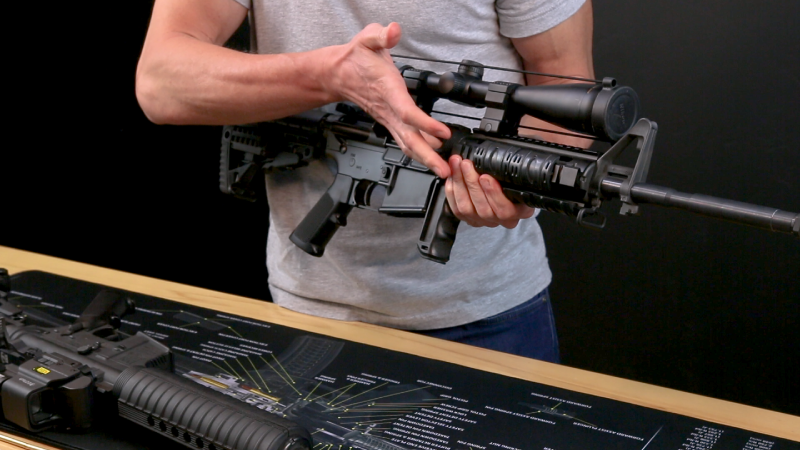
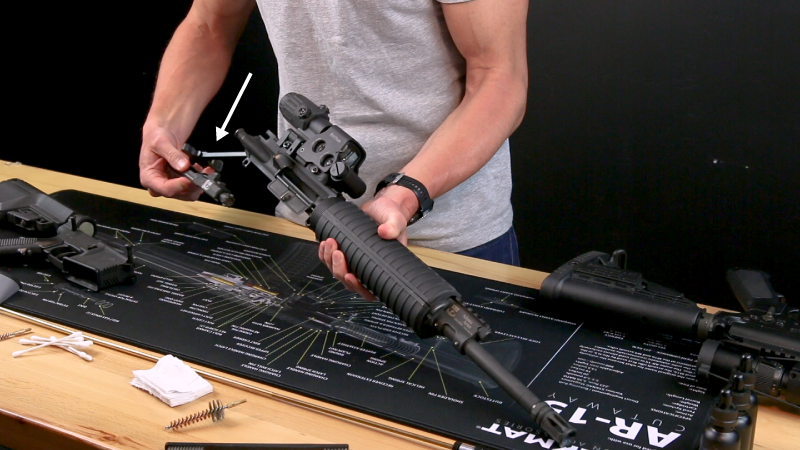
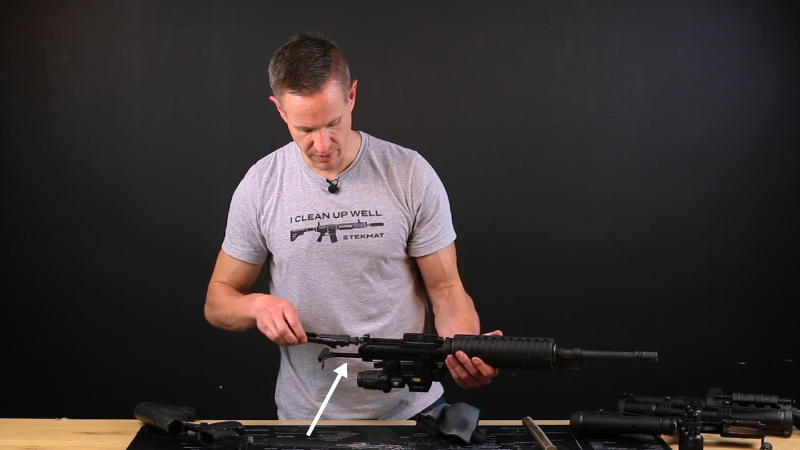
Step One: Disassembly. Push out the take downward pivot, which allows the upper and lower to split up.
And then move your pin pin at the front, so you can completely separate both the upper and the lower.
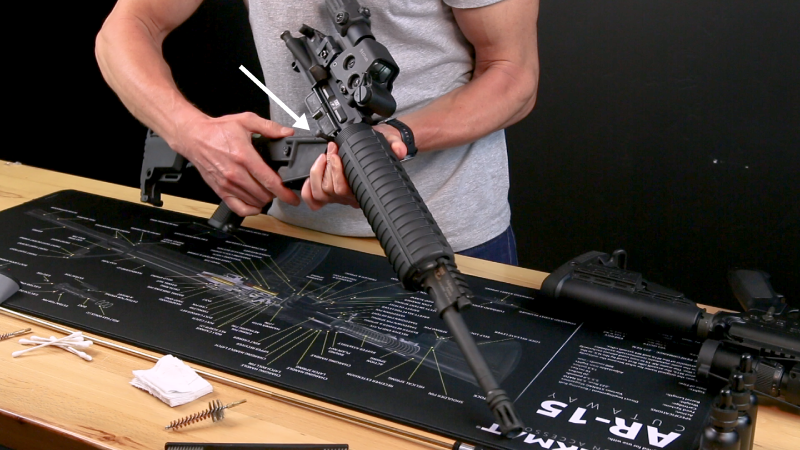
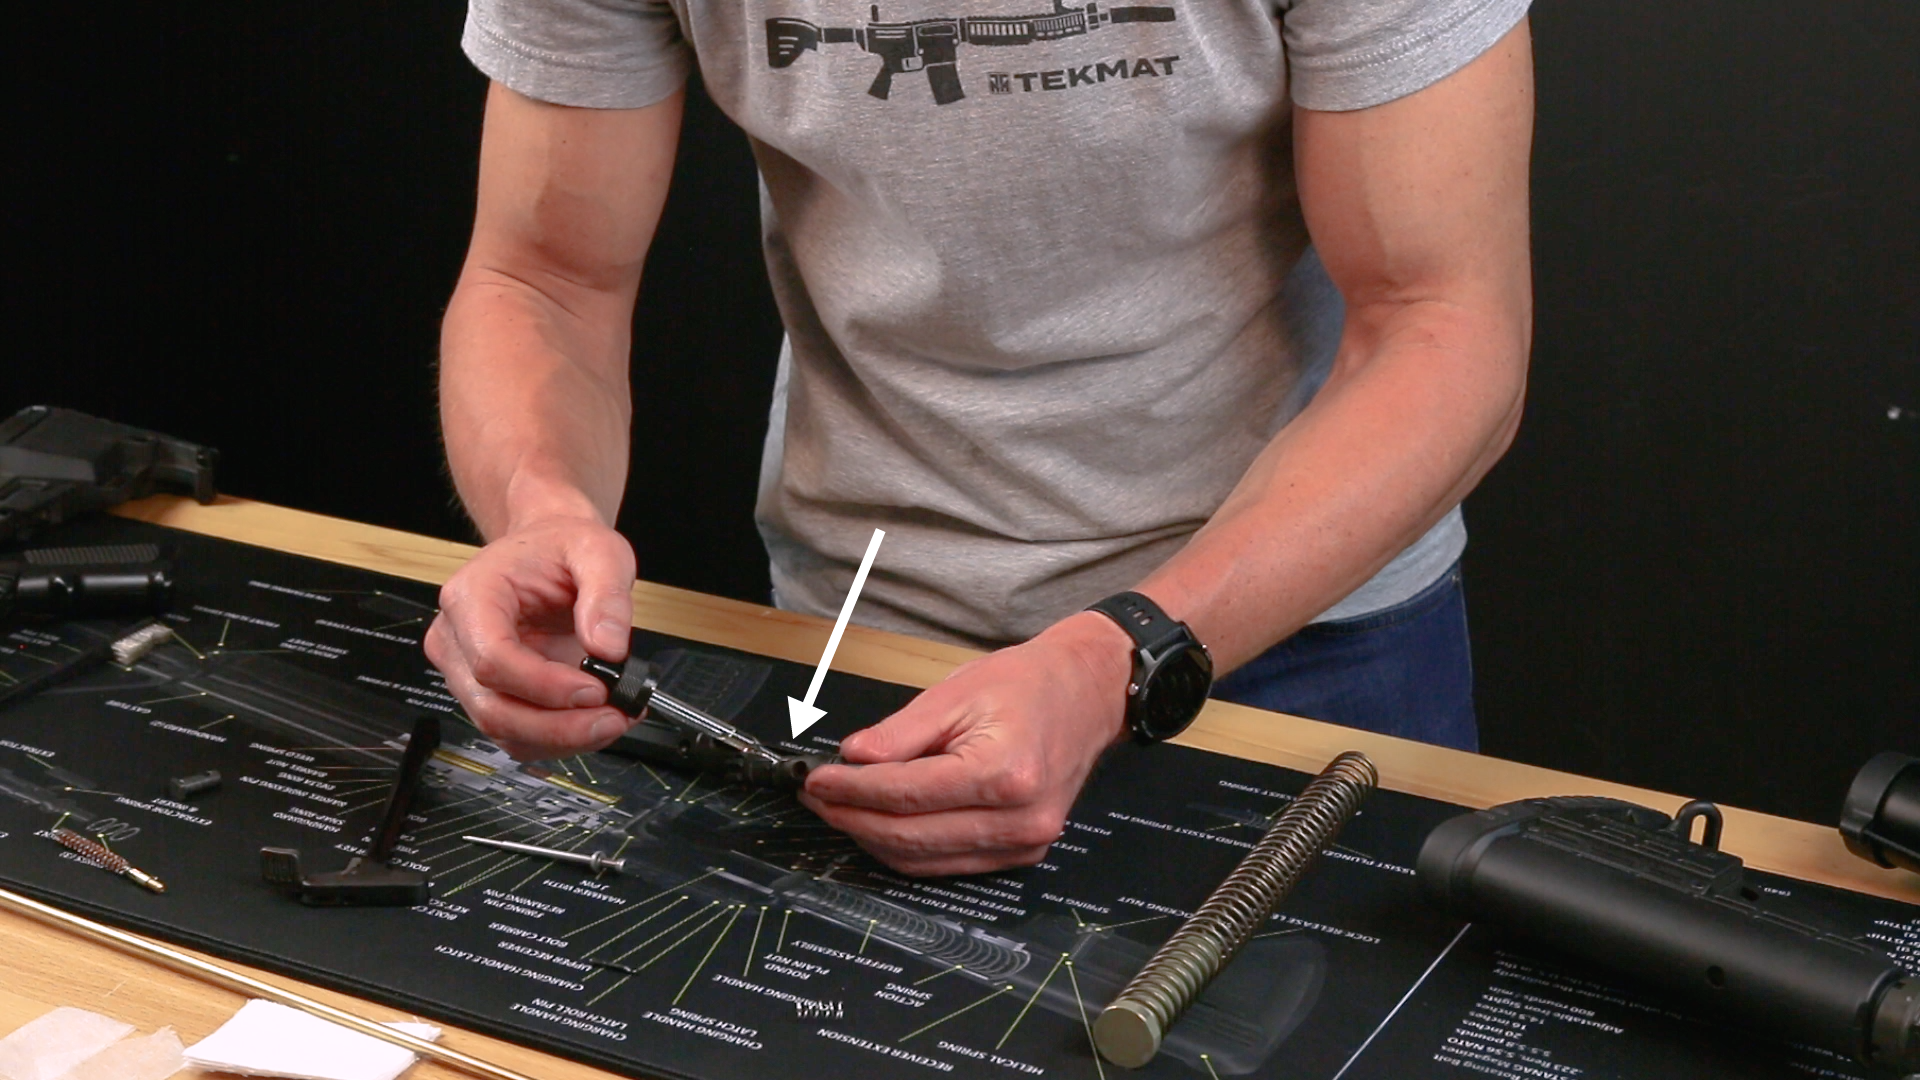
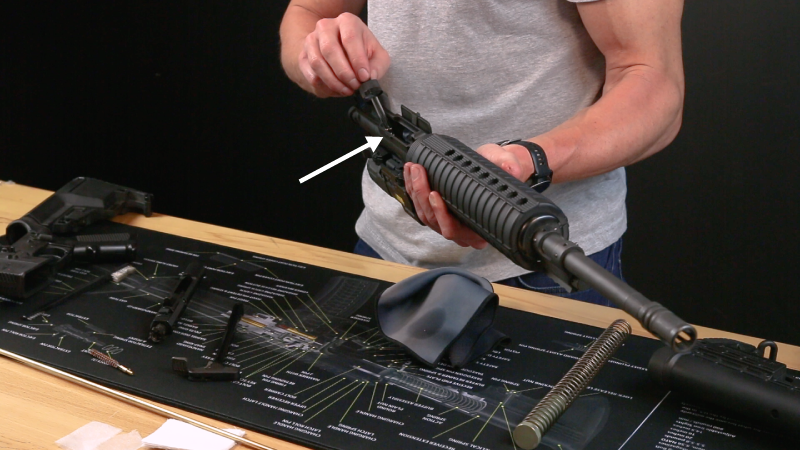
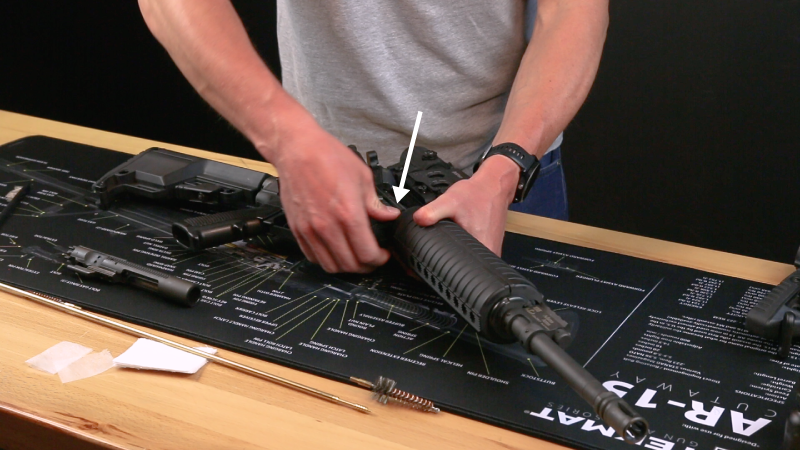
Slowly pull the charging handle back so pull the bolt carrier group out and set it aside. Remove the charging handle.
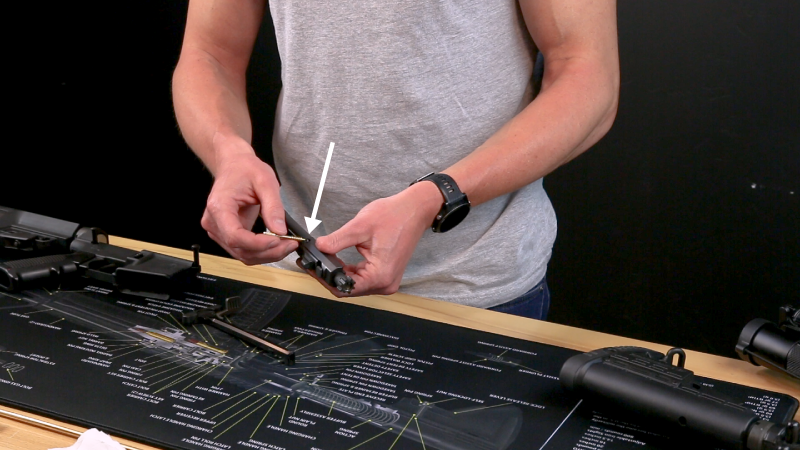
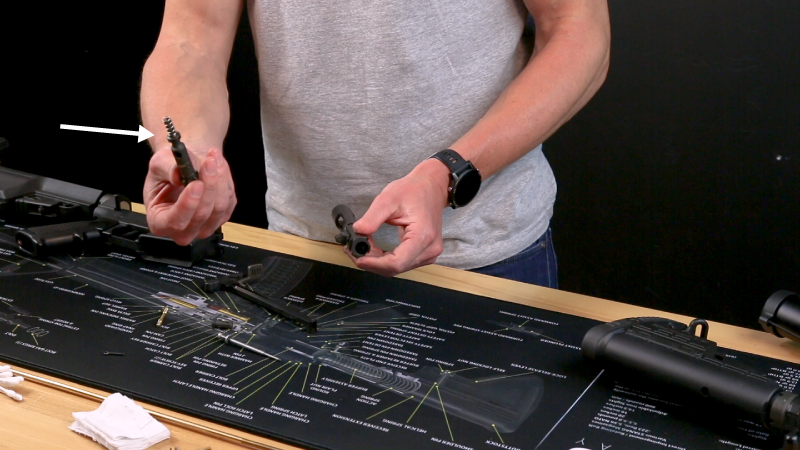
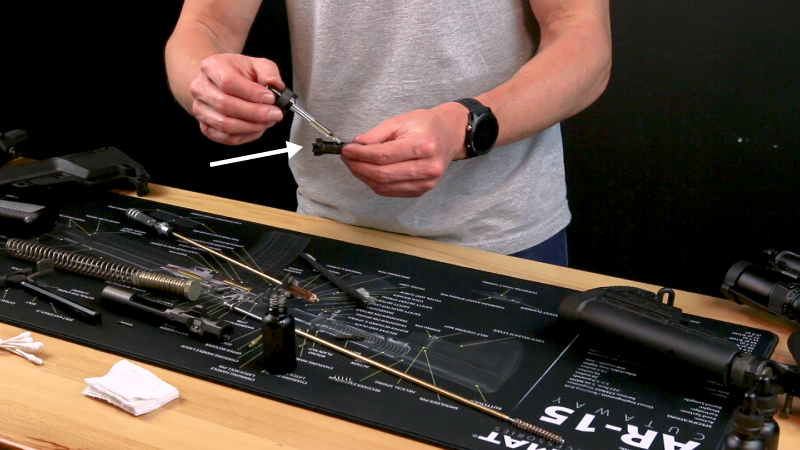
This next role is the hardest to disassemble: the bolt carrier assembly. Kickoff, remove the retaining pin. If you lot can't pull it out with your finger you tin use your jag.
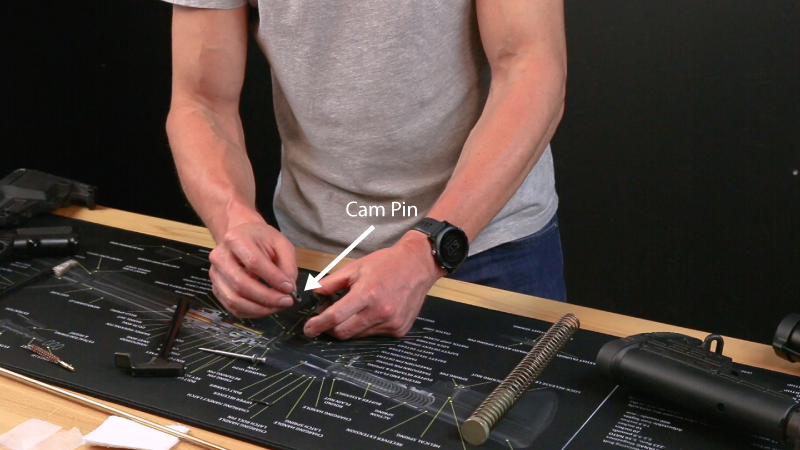
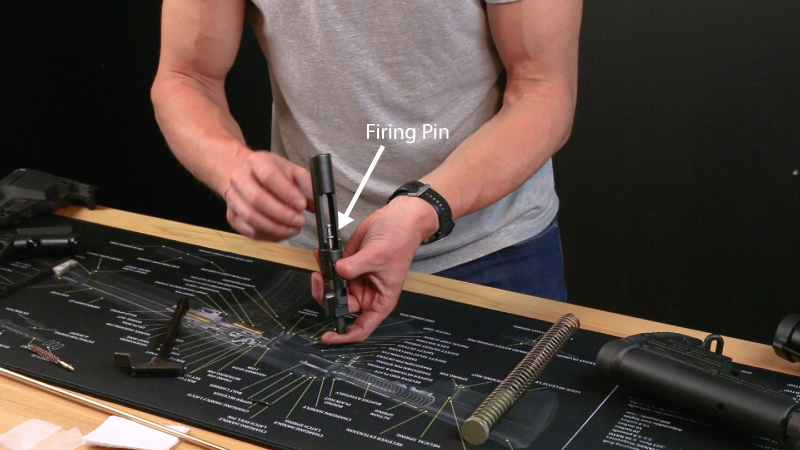
After removing the retaining pivot simply tip the commodities carrier assembly backwards and the firing pin should slide out. Once the firing pivot is removed you can at present remove the cam pin. To remove it, push the commodities in towards the rear of the assembly and so rotate the cam pin then that the straight edges of the pin are parallel with the bolt carrier assembly, and then pull it out.
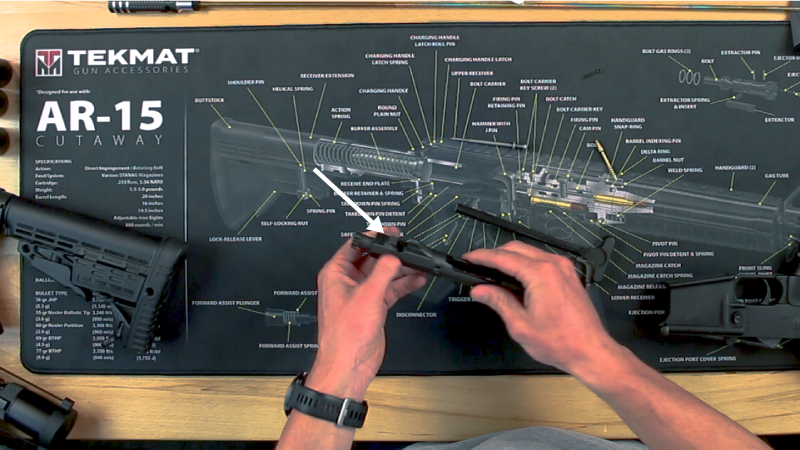
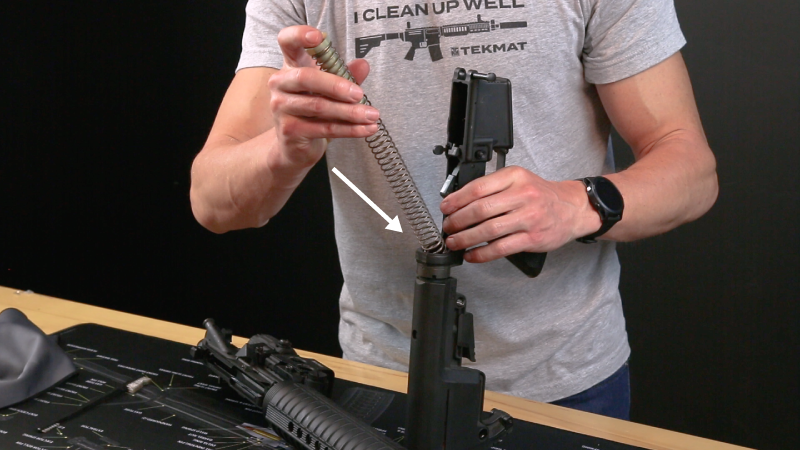
Lastly, remove the commodities past simply pulling it out. You tin also remove the extractor if you'd like to clean that fleck. At present button down on the buffer retaining pivot and that volition let your buffer come forward.
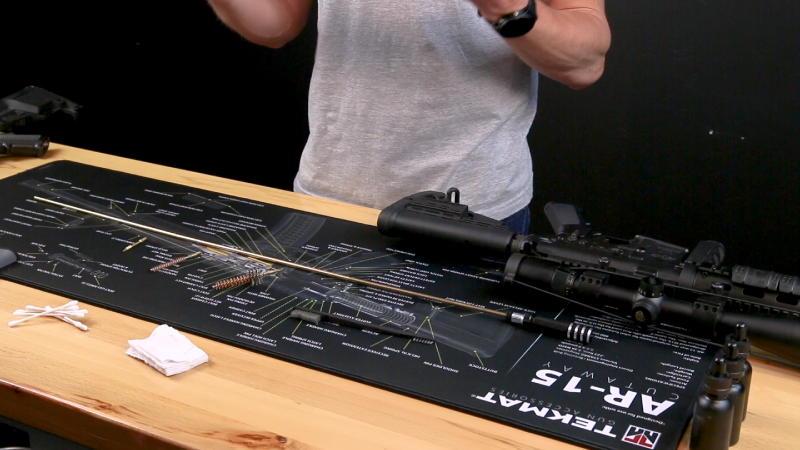
Step Two: Cleaning. You start off past beginning cleaning the barrel. At that place are a couple of means yous tin do this simply we prefer merely to put some solvent on the bore brush, thread that onto the cleaning rod, and run that through.
Information technology's important to remember that we always piece of work from the bedroom end of the burglarize. A swiveling cleaning rod is nice because it allows the bore castor to follow the rifling on the AR-15 in the barrel. That ways you can just pull the rod back through the butt rather than pulling it out and constantly working in ane direction. Once you've got the solvent in the butt you can go out information technology to soak and move on to the bedroom brush.
The chamber brush has two sizes of brushes - the cartridge of a .223 or a .556.
This larger size cleans the lugs where the locking bolt engages. Drip some solvent on the lugs, get the chamber castor in in that location, and give information technology a spin.
That helps to get the solvent around the lugs. Now look in and make certain everything is nice and wet. If it is, you've got enough solvent in there and then you tin put some on your nylon castor and work that around inside the activeness area. You can permit that area sit down and soak while you move on to the other areas of the firearm.
Nosotros similar to utilize droppers for our chemicals considering it lets us control how much solvent is used in the diverse areas.
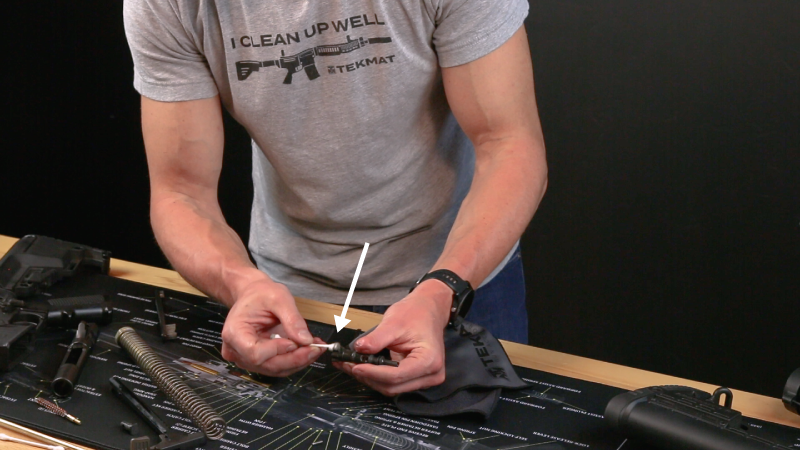
More solvent is needed for spots that take more buildup or crud. Next we'll baste some solvent on the commodities, scrub it in with the brush, and allow it soak. Do the aforementioned thing with the firing pin, bolt carrier, charging handle, and anything else that looks dirty. Utilize a bit of cleaner to become the surface area moisture, motion information technology around with the castor, and permit it sit and soak for a while. Besides focus on your magazine catch, merely within the magazine, and where the pin moves.
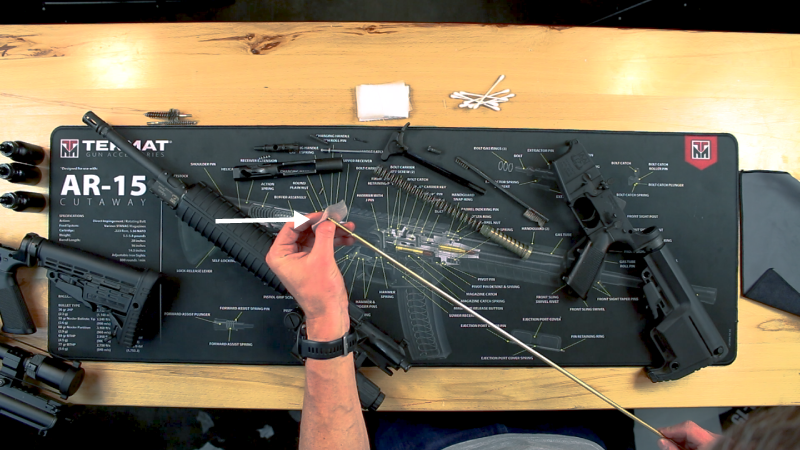
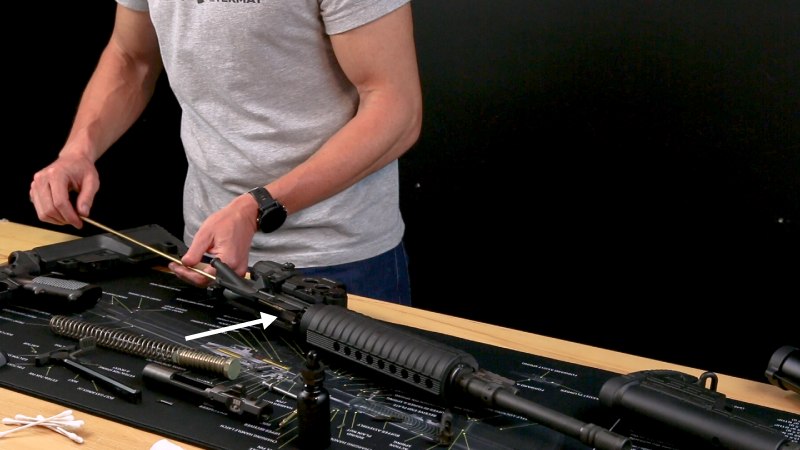
Now that you've scrubbed pretty much everything that needed cleaning, it'due south time to let what you but cleaned soak while you go back and clean up the upper portion of your firearm. You lot can now clean off the cleaning solvent on your barrel, the bore, and the sleeping accommodation. With your thinner patches and your jag you're going to clean out the barrel. Wrap i patch around the jag and push button it through the barrel.

We're going to practice this until the patches come out make clean, because so we know that we've got all of the cleaner and solvent out. The thinner patches are nice considering they're more porous and seem to pick up a lot more crud as you move through. Keep to push patches through until you have one that comes out clean.
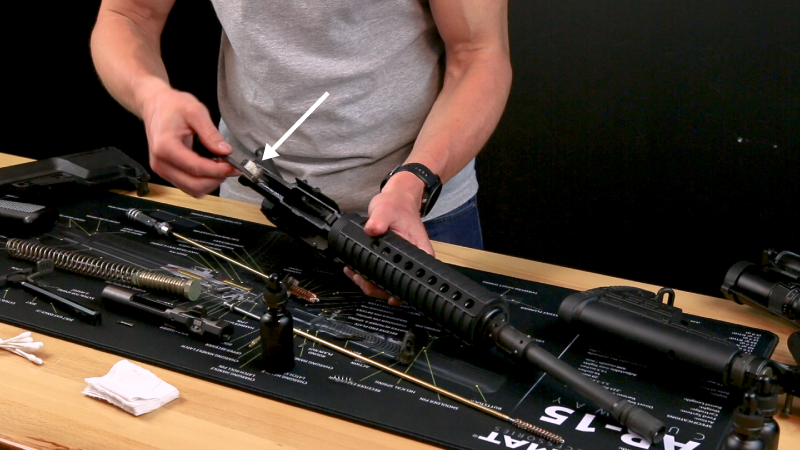
For the chamber area we like to put the .22 bore brush back on the cleaning rod and use some of the thicker patches. Simply gyre information technology around the brush and pull tight. That allows the bristles on the brass to aid grip the patch, ensuring a more solid make clean.
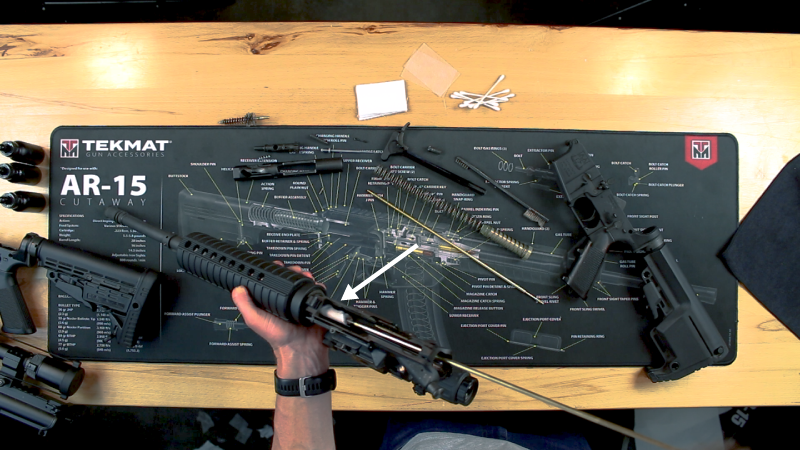
Sideslip the cleaning rod into the sleeping room, spin it around, and pull it dorsum out.
Follow that same blueprint for the rest of your firearm. Just wipe upwards the remainder of the solvent using your cleaning rod, the patches, and the cotton swabs when you need to become into little nooks and crannies.
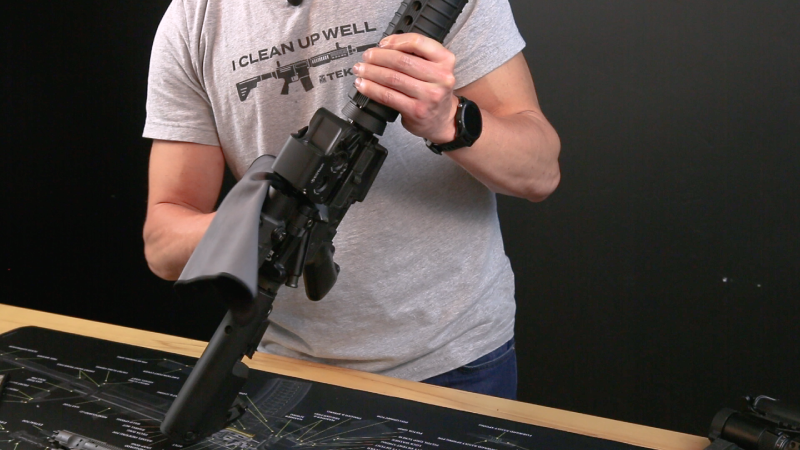
Now you're going to use the rough side of the TekTowel to give your firearm a quick wipe down. Only selection up the parts and give them a expert wipe downward to ensure that all of the cleaner and solvent is off.
Now that your firearm is completely cleaned and wiped off, it's time to lubricate high-clothing areas. The difference between lubricant and protectant is that the lubricant is slightly thicker and is perfect for high-habiliment areas. The protectant is a bit thinner and acts like a conditioner for the metal so we're going to put that everywhere else.
It's handy to clean a firearm that has seen some utilise considering then you tin see the high-vesture areas more hands. With those areas you're going to use your dropper to put a few drops in to make sure those areas are conditioned.
It's all-time not to make your firearm besides wet. About locations for shooting are somewhat dry and dusty and if your firearm is too wet it'll attract dirt, which can become abrasive and actually really damage your weapon.
The lubricant can be applied every bit you are re-assembling your firearm. To re-get together y'all just practice everything that you did to disassemble it, just in reverse. In that location are just a couple of things that you need to continue in mind.
While putting the bolt carrier assembly back together, when you put the cam pivot back in, brand sure to rotate it so that the straight edges are perpendicular to the assembly, otherwise the firing pivot won't go in all the way.
Also, when you're putting the commodities carrier assembly dorsum into the upper, make sure that the bolt is pulled out, then that the assembly volition fit back in.
After everything is reassembled, drip some protectant on your TekTowel and give your firearm a good wipe down. The protectant will work its way into the metal and help to forbid corrosion and rust from happening. Remember that lubricant goes in high-wear areas and protectant covers pretty much everything else. It'due south not necessary to lubricate or protect any of the plastic pieces. If by some risk reason either lubricant or protectant happens to go on the plastic pieces, that'southward okay. The chemicals won't hurt the plastic.
And then that's it! It'south probably a lot easier than you lot idea to become this all cleaned and ready to become, which is ever a good thing. Cleaning your firearm is important to make sure that it stays in good working order, but information technology's also important to recollect to enjoy yourself and learn while you're doing it. If you take any problems while putting the weapon back together, simply refer back to your TekMat to get the names and locations of the parts you need to focus on. Too, if you accept any suggestions or comments or if we missed anything, experience free to get out a comment beneath so that we can amend. Feel complimentary to check us out on TekMat.com to come across the wide variety of products we offer that were designed to make your life easier.
Final note: The TekMat's themselves are super easy to clean. After you've cleaned your firearm several times and the mat looks similar it could use a cleaning itself, simply scrub it with some lather and water, rinse it off, and let information technology air dry. Information technology'll be back to new in no time.
Interested in seeing how to clean your AR-15? We have a keen in depth video with the owner of TekMat. He dives deep into the difference between direct impingement and gas piston AR-15'south and how to properly clean your AR-fifteen.
Tools Used:
TekMat AR-15
TekMat AR-15 Ultra
TekTowel
AR-15 Cleaning Kit

Source: https://tekmat.com/blog/how-to-properly-clean-your-ar15/
Posted by: lovellequithere1991.blogspot.com
0 Response to "How To Clean A Gas Impingement Tube"
Post a Comment